Silhouette Cameo
 From EduTechWiki - Reading time: 8 min
Introduction[edit | edit source]
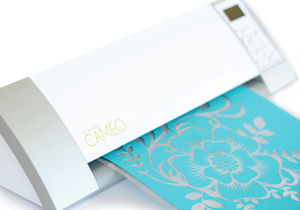
The Silhouette CAMEO is a low cost home-user cutting machine. Since it works like a plotter (and actually you can use it as such) it's also known as cutting plotter and since it is mostly used to cut vinyl it is also known as vinyl cutter. The Silhouette Cameo is probably the most simple tool to get for starting a simple fab lab. It also seems to be a popular instrument in schools since it is not only easy to use but it is also cheap, light and it takes very little time to cut (as opposed to embroidery or 3D printing for example).
This tool was the forth addition to the micro fab lab at TECFA.
According to Silhouette Cameo USA “The Silhouette CAMEO™ is an electronic cutting tool for personal use. Like a home printer, it plugs into your PC or Mac® with a simple USB cable. However, instead of printing it uses a small blade to cut paper, cardstock, vinyl, fabric and more up to 12" wide and 10 feet long. The machine also boasts a quiet motor and the ability to register and cut printed materials.”
See also:
Specifications and installation[edit | edit source]
What can it do ?[edit | edit source]
This machine can make Scrapbook pages, Cards, Custom apparel, Vinyl décor, Etched glass, Sketch designs, Temporary tattoos, Paper crafts. Technically speaking, it can cut:
- Paper
- Cardstock
- Adhesive cardstock
- Adhesive vinyl
- Fabric
- Heat transfer material (e.g. designs that you could iron on cloth)
- Printable heat transfer material
- Rhinestone templates
- Removable tatoo paper
- Vellum (fine sized skin)
- Magnetic paper (print a design with an inkjet printer before)
The machine includes an optical sensor allowing to cut out designs that were first printed on an Inkjet printer.
The Cameo is hooked to the computer with a USB cable. In addition, it also has a slot for an SD card.
Installation[edit | edit source]
- Download the latest software from http://silhouetteamerica.com/software. (This software also comes with the included CD, but it's an older version probably).
- Enter the 13 digit code if you also bought the Silhouette Studio Designer edition. This will unlock extra features
- Connect the Silhouette to your PC
- On Win 7 64-bit: Power off the Silhouette. Insert the CD in the box and install the driver which can be found on Silhouette-Studio/Driver_64_English/GDSETUP64.exe. Ignore the warnings in the installation dialog.
Software and formats[edit | edit source]
A free Silhouette Studio software is included. This program includes the following functionality:
- Simple line drawing
- Simple vector object manipulation (e.g. aligning, flipping, resizing)
- Tracing (cut line creation)
- Canevas and materials definition (size, orientation plus hints for blade adjustment)
- Send to cutter
Formats
The Silhouette Studio software uses the proprietary '*.studio binary file format, which consist of vector art for line and color/gradient fill type data intended for printing and/or cutting.
It can read the following vector file formats:
- GSD/GST (Robo master): ready to cut
- DXF (Autocad): ready to cut
Other vector formats:
- The $50 extended Cameo software can read SVG files and it includes more drawing features. We strongly suggest to buy this or else try out a third party software (see below), since you then can import drawings from various vector drawing programs. In addition, you can reuse free clipart, in particular hundreds of good designs from openclipart.org
- WMF and EMF (?)
Bitmap images (must be traced)
- JPG, BMP, PNG, GIF
Finally, Studio can acces TTF font files.
Third party software
- Make the cut ($60). Probably has better drawing features than the Studio software.
- Sure Cuts A Lot ($60).
Vinyl cutting basics[edit | edit source]
The process includes the following major steps
- Designing
- Adjusting size (design and or "paper")
- Cutting
- Peeling off the unwanted stuff
- Applying to a surface (usually using transfer paper)
Creating a design with the Silhouette Studio Designer software, and then cutting it with the Silhouette Cameo is really easy.
However, we suggest not to start with a lot of lettering, since these are more difficult to transfer. A connected design is easer....
Create or load a design[edit | edit source]
These operations are done in the Silhouette Studio software.
Adjust page size:
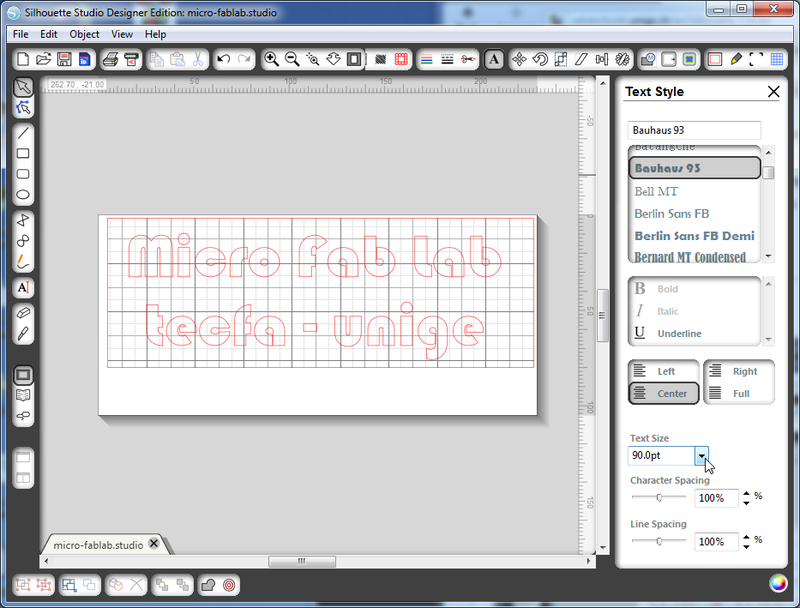
- In page panel to the right, select the size of your drawing. You can use some presets, E.g. A5 landscape.
- You can ajust the size of the drawing panel at all time. Just make sure that the design fits and that you don't waste materials.
- If this panel doesn't show, click on the upper 4th icon on top from the right.
Create a design
- For starters, we suggest typing some text, but not too much (peeling off the vinyl is not so easy)
- You can select font, font-size and font variation in the Text Style panel (A icon on top
- Then, enter the text using the text tool A icon in the left tools panel.
- Readjust font size, etc. and position.
Verify settings
- I suggest to verify the page size again. Length doesn't matter, but width must be smaller than your vinyl roll's width.
- Also, make sure that you selected the right material (see also below)
Extra tips:
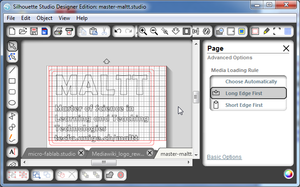
- Watch out for the "printing" edge. If you use a larger size (e.g. A4) the edge that feeds into the cutter may be wrong (i.e. the short edge instead of the long), which is a waste on 12inch paper. Use advance Options (bottom of the panel) to fix that. E.g. select
- Long edge first
- Select 12x12 cutting mat (if it doesn't work). Then in the paper panel, deselect cutting mat again.
Select the cut settings[edit | edit source]
In the software:
- Open the silhouette cut settings panel (3rd icon from top/right)
- Select material, e.g. Silhouette Vinyl.
- This will adjust the speed and thickness.
- It will tell how to adjust the blade setting (see below)
- It also will tell if you need a cutting mat
Cut[edit | edit source]
On the Cameo:
Notice:
- Just insert the end of the vinyl roll. If you plan to cut it before, make sure that there is some extra space with respect to the design, i.e. at least 3cm else the rollers can't move the vinyl forwards and backwards ....
- Rolls are not ideal for feeding vinyl. Since the vinyl will curb inwards/downwards on the cutter, the loading procedure can fail. Re-roll the vinyl in the other direction in order to remove some tension...
Procedure:
- Adjust the blade setting, e.g. 1 for vinyl (read p. 9 in the getting started manual). This is important, if it's too high it will cut through all the material and if it's too low it won't cut.
- Adjust the rolls to the width of the material
- Release the blue lever on the right hand side
- Adjust the white roller that is on the right. Before moving it, hold the one on the left so that the bar can't turn. Then turn the right one so that it snaps off and then move it.
- Return the blue lever on the right hand side to upright lock position
- Insert the vinyl
- Insert the vinyl color side up. Make sure to push it to the left and that it fits under the white rollers.
- Select load media and press enter
- Adjust (straighten). Release the lever doing so and then close it again.
You are now ready to send the file for cutting ...
On the PC
- Click the Send to Silhouette button on the top toolbar.
- Verify the settings
- Click on (5) Cut page
Apply[edit | edit source]
- Cut the design (if not done before) off the roll.
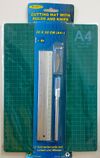
- We suggest using a knife and a cutting map. You can buy one of these in any DoItYourself store.
Remove excess vinyl:
- Remove all the negative (not used vinyl).
- Hold down the stuff you want to keep by pressing with a finger or an other soft item such as the rubber end of a pencil. Peeling off the not wanted stuff isn't as easy as in the videos ...
- Use a hook (available in the starter kit) to remove small parts if necessary.
Apply transfer paper to design:
Instead of directly pulling off the vinyl and applying it to a surface it's better to use transfer paper. Transfer paper has light glue on one side and to which the vinyl will stick. There seem to be two variants: a cheaper tape-like roll and a more expensive roll with paper to peel off.
- Cut a transfer paper sheet in roughly the same size (else you will have to apply each item manually and that can go wrong)
- Remove the cover
- Apply it starting carefully from one end. It's best to apply it without any rotation. This way aligning the design to a surface will be easier.
- Smoothen it with the scraper (available in the Vinyl starter kit). Make sure to apply some force so that it is flat and that it sticks. If your design includes many little parts, make sure to apply pressure to each one !
- Then lift off the design. It should stick to the transfer paper
Apply the design to a surface
- Draw two points for alignment or find another procedure
- Stick it slowly starting from one end (You won't have many attempts)
- Then smoothen/apply with the scraper. Apply force and do it repetitively in both direction. Make sure to do it for each little part.
- Peel the transfer paper off
- Enjoy ....
Cutting small pieces of vinyl[edit | edit source]
You may do this in order to not throw away excess materials. Use the silhouette mat provided when you buy the tool. The vinyl will stick to it. (not yet tested actually).
Of course, you then will have to change the settings.
SVG Import[edit | edit source]
After importing your first SVG file it just won't "print". "Cut page" will tell you that it was successful which is true since your imported graphic didn't have anything to cut. You will have to define cut lines and that is easy if your SVG graphic is simple.
Before[edit | edit source]
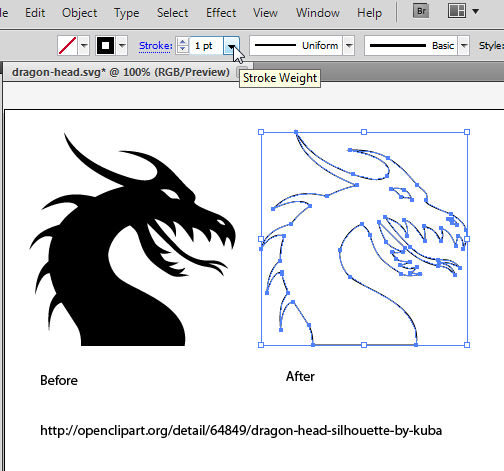
Before importing an SVG image it is best to adapt it with your favorite vector graphics editor, e.g. Inkscape, Adobe Illustrator or Corel Draw
- Remove the fills of all areas
- Add a stroke to each fill-only area. Also, make sure that they are visible, e.g. set line thickness to 1px or something like that. Many drawing programs may create either fills or lines that are there but not visible (either white or to small).
In the Studio Designer[edit | edit source]
- After importing, you probably should ungroup the graphic. Select it and click on the ungroup icon (bottom panel, second from the left). You may have to do this twice. At this point you also can edit the points using the context menu (right-click).
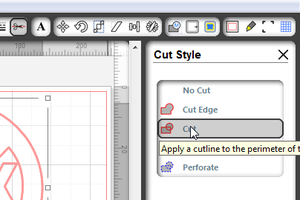
- “As SVG files may contain multiple lines, some of which are intended for printing rather than cutting, to enable the desired cut lines you may go to the Cut Style menu (the icon that looks like scissors cutting a red line) and select the desired cut line style for your imported SVG image.” (Opening SVG files (Designer Edition), retrieved 20:37, 14 February 2012 (CET))
- Select all drawings or each image individually then either define cut lines just for the outline or for all lines.
- Typically you would use "cut" (second item, apply a cutline to the perimeter of the selected shape) in the Cut Style panel.
Simple heat transfer[edit | edit source]
- Designs are made like for vinyl. However, you might avoid fine elements (since they may peel of the textile)
- The design has to be mirrored. Use Menu: Object->Transform->Flip horizontally
- Feed the heat transfer material directly (without mat) with the clear plastic side down
- On the cutter, change thickness to 1 for normal (simple) heat transfer material and to 3 for flocked material!
- Cut
- Peel of the negative space, i.e. the color sheet. Only the plastic with the design stuck to it should remain
- Make sure that the fabric is absolutly flat. If not, iron it before. Else there will be folds
- Place the sheet on the fabric, put a cloth on top and iron for a minute at max. 300 degrees. Put the iron on top, then move it a bit lifting it and put it down. No need to move.
Extra tips
- My first attempt was using a "glitter weiss" roll. The material loaded into the cutter had a tendency to rool upwards (vinyl goes downward) and a corner got stuck in the belt. Make sure that this doesn't happen. E.g. insert a sheet of paper from behind.
- Also, make sure that thickness is appropriate, e.g. the minimum for "normal" heat transfer material. I mistakenly thought that the "glitter weiss" roll was flocked, but it isn't and I got the blade settings wrong (3 instead of 1). The cutter then also cut through the plastic at places which didn't much harm though for a transfer to an old jacket...
Links[edit | edit source]
Official
- Silhouette Cameo UK
- Silhouette Cameo USA
- Silhouette Blog (USA). This blog includes many tips + discussion.
Reviews and ideas
- Silhouette CAMEO by by AshleyAnn.
- Silhoutte Studio 3 manual
The Cameo and other vinyl cutters in Fab Labs
Sharable designs
- The 'Vinyl Cutter' System (Thingiverse). Includes a small list of things.
- OpenClipArt (you must own the SilhouetteStudio Designer Edition, $50).
Tutorials
 KSF
KSF