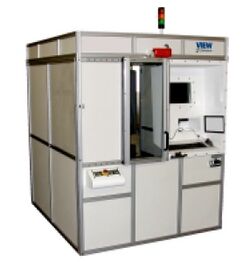
VIEW Engineering
Topic: Company
 From HandWiki - Reading time: 5 min
 | |
| Type | Private |
|---|---|
| Industry | Semiconductor device fabrication Integrated circuit packaging Printed circuit board Computer data storage Precision assembly & fabrication |
| Fate | Renamed to VIEW Micro-Metrology (2008) |
| Founded | Canoga Park, California (March 9, 1976) |
| Founder | Dr. Richard Hubach Jack Sacks Veeder South |
| Headquarters | Tempe, Arizona , |
Number of locations | 1 facility (2011) |
Area served | Worldwide |
| Products | Machine vision systems Coordinate-measuring machines Automated optical inspection systems |
| Parent | Quality Vision International, Inc. |
| Website | www |
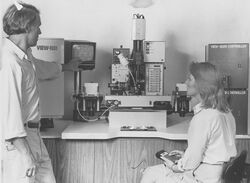
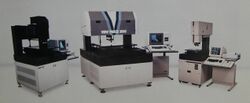
VIEW Engineering was one of the first manufacturers of commercial machine vision systems.[1] These systems provided automated dimensional measurement, defect detection, alignment and quality control capabilities. They were used primarily in the Semiconductor device fabrication, Integrated circuit packaging, Printed circuit board, Computer data storage and Precision assembly / fabrication industries.[2] VIEW's systems used video and laser technologies to perform their functions without touching the parts being examined.
History
While working as a physicist at Hughes Aircraft Company, Dick Hubach recognized a need for automated dimensional measurement systems, when he discovered that the cost to verify the correct manufacture of some aerospace components actually exceeded the cost to manufacture those components.[3] This recognition led to a new start-up company named VIEW Engineering.
VIEW Engineering was founded in Canoga Park, California in 1976.[1] The next year, VIEW introduced the word's first automated, 3-axis, machine vision-based, dimensional measurement system – the RB-1.[4] The RB-1 was the forerunner of modern machine vision-based Coordinate-measuring machines (CMMs). This was followed in 1978 by the introduction of the first pattern recognition (Template matching) system for automated Wirebonding machines and Wafer probers – the PR-1.[4]
As the company's business increased, VIEW Engineering relocated to a facility in Chatsworth, California in late 1977 and again to Simi Valley, California in 1981.[5]
General Motors Corporation invested in VIEW Engineering in 1984[6] as part of its plan to improve automobile manufacturing quality in the U.S. through widespread use of factory floor machine vision technology. In 1989, VIEW Engineering purchased Synthetic Vision Systems, Inc.[7]
VIEW Engineering was an OEM for Mitutoyo in the late 1980s. This relationship was concluded when Mitutoyo licensed VIEW's machine vision technology in 1994. This licensed technology became the foundation for Mitutoyo's video and laser-based CMMs.[8]
In 1996, Robotic Vision Systems, Inc. (RVSI) first brought a patent infringement lawsuit against VIEW Engineering related to the coplanarity measurement of packaged semiconductor devices.[9] In 2000, RVSI's patent was finally declared invalid and the U.S. District Court for the Central District of California ruled in favor of VIEW Engineering.[10] Even after this ruling, RVSI contemplated continuing its appeals through 2001.[11]
Also in 1996, VIEW Engineering was purchased by General Scanning, Inc. (GSI).[12] Quality Vision International, Inc. (QVI) purchased the company from GSI Lumonics (previously GSI) in 2000.[13] In 2005, QVI combined VIEW Engineering with Micro Metric, Inc. of San Jose, California, and in 2008 renamed the new company "VIEW Micro-Metrology."[1] In 2009, VIEW's California operations were relocated to QVI's Western Region facility in Tempe, Arizona.
VIEW Micro-Metrology continues to be global supplier of high-accuracy video coordinate measuring systems and software, primarily serving micro-electronic, mobile device and data storage manufacturing.[14]
Product timeline
- 1977: VIEW RB-1 – An automated, 3-axis, binary image, machine vision-based, dimensional measurement system (a forerunner of modern machine vision-based CMMs)
- 1978: VIEW PR-1 – A binary image, pattern recognition system for automated Wirebonding machines and Wafer probers
- 1981: VIEW 719 – A general-purpose, binary image, machine vision system for shop floor use
- 1982: VIEW 1101 – A 2nd generation, binary image, pattern recognition system for automated Wirebonding machines and Wafer probers
- 1982: VIEW 1119 – A combination of the 719 and the 1101 that provided pattern recognition and edge detection capabilities
- 1982: VIEW 1200 – A binary image, machine vision-based CMM
- 1985: VIEW 720 – A 2nd generation, general-purpose, grayscale image, machine vision system for shop floor use
- 1985: VIEW 1220 – A 2nd generation, grayscale image, machine vision-based CMM
- 1986: VIEW 725 – A dedicated machine vision system for QFP (Quad Flat Package) and PLCC (Plastic leaded chip carrier) package inspection
- 1987: VIEW Précis 3000 – A large-travel, machine-vision-based CMM
- 1988: VIEW Bazic8 & Bazic12 – Machine vision-based CMMs
- 1989: VIEW Ultra8 – A high-accuracy (sub-micron), machine vision-based CMM
- 1990: VIEW 7100 – A 2nd generation, machine vision system for QFP and PLCC package inspection
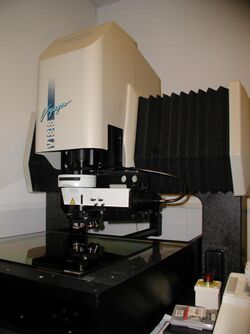
- 1993: VIEW Voyager 6x12, Voyager 12x12 & Voyager 18x18 – Machine vision-based CMMs
- 1994: VIEW 830 – A laser-based, 3D scanner system for PGA (Pin grid array) package inspection
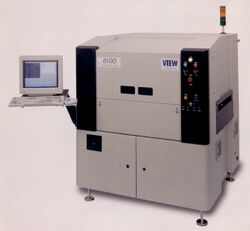
- 1995: VIEW 8100 – A laser-based, 3D scanner system for SMT (Surface-mount technology) process characterization and control
- 1995: VIEW 880 – A laser-based, 3D scanner system for in-tray inspection of QFP, TQFP (Thin Quad Flat Pack), TSOP (Thin small-outline package) and BGA (Ball grid array) packages
- 1997: VIEW 890 – A laser-based, 3D scanner system for bump-on-die (Flip chip) inspection
- 1999: VIEW Pinnacle 250 – A high-accuracy, machine vision-based CMM
- 2001: VIEW Summit 450 & Summit 600 – High-accuracy, large-travel, machine vision-based CMMs
The timeline given above is summarized here.[4]
Patents
- VIEW Engineering's patents related to correlation-based pattern recognition were the foundation of the company's beginnings
- Correlation-based Pattern Recognition hardware and software to find the position of specific, complex part features in video images. (United States Patent 4200861 & 4736437 & 4385322 & 4300164)[15]
- A number of VIEW Engineering's 31 patents address key video technologies useful in machine vision-based CMMs including
- Programmable Ring Light[16] hardware to enhance the appearance of weak-edges in video images by controlling illumination intensity, direction, color and angle of incidence. (United States Patent 4706168)[15] (Japan Patent 2001-324450)[17] (China Patent 200810207342)[17] (Canada Patent CA 1293232)[18]
- Automatic, Video-based, Camera Focusing to determine the Z-axis position of an object under inspection. (United States Patent 4920273)[15] (Canada Patent CA 1255796)[19]
- Ronchi Grid Surface Focus[20] hardware to allow automatic camera-focusing on reflective or low-texture surfaces. (United States Patent 4743771)[15]
- Other VIEW Engineering patents relate to the 3D laser-scanning technology used in VIEW's PGA, QFP, TQFP, TSOP and BGA package inspection systems
- Using Multiple Cameras to Image a Package. (United States Patent 4872052)[15]
- Triangulation-based 3D Imaging. (United States Patent 5546189 & 5617209)[17] (Korea Patent 1019997000995)[18] (PCT Patent WO 1998/005923 & 1996/034253)[18] (Canada Patent CA 1287486 & CA 1265869)[18]
References
- ↑ 1.0 1.1 1.2 "About VIEW Micro-Metrology". VIEW Micro-Metrology. http://www.viewmm.com/about.jsp. Retrieved 7 July 2011.
- ↑ "VIEW Micro-Metrology Applications". VIEW Micro-Metrology. http://www.viewmm.com/mm_apps.jsp. Retrieved 7 July 2011.
- ↑ "VIEW Ugly Duckling PDF Document". VIEW Micro-Metrology. https://drive.google.com/open?id=0B38vY4sdZ6JXN2JiTzFDbnVjZ0E. Retrieved 12 July 2011.
- ↑ 4.0 4.1 4.2 "History of VIEW Micro-Metrology". VIEW Micro-Metrology. http://www.viewmm.com/history.jsp. Retrieved 9 July 2011.
- ↑ "VIEW Engineering, Inc, Simi Valley". Techspex. http://www.techspex.com/techspex/suppliers/info?company_id=5354. Retrieved 7 July 2011.
- ↑ "GM Corp acquires a minority stake in VIEW Engineering Inc". Thomson Financial Mergers & Acquisitions. http://www.alacrastore.com/storecontent/Thomson_M&A/General_Motors_Corp_acquires_a_minority_stake_in_View_Engineering_Inc-161019043. Retrieved 7 July 2011.
- ↑ "VIEW Engineering Inc acquires Synthetic Vision Systems". Thomson Financial Mergers & Acquisitions. http://www.alacrastore.com/storecontent/Thomson_M&A/View_Engineering_Inc_acquires_Synthetic_Vision_Systems-241296020. Retrieved 7 July 2011.
- ↑ "Mitutoyo Company UK, Mitutoyo Worldwide, Section 9, 2nd Paragraph". Mitutoyo UK. http://www.mitutoyo.co.uk/Mite/mws.jsp?WorldWide. Retrieved 13 July 2011.
- ↑ "189 F3d 1370 Robotic Vision Systems Inc v VIEW Engineering Inc". OpenJurist. http://openjurist.org/189/f3d/1370/robotic-vision-systems-inc-v-view-engineering-inc. Retrieved 14 July 2011.
- ↑ "Court Decides on Machine Vision Patent Suit". Society of Manufacturing Engineers. http://www.sme.org/cgi-bin/get-press.pl?&&20001737&April%206,%202000&&SME&. Retrieved 14 July 2011.
- ↑ "Robotic Vision Systems Inc Says It May Appeal in Patent Infringement Suit". MachineVisionOnline. http://www.machinevisiononline.org/vision-resources-details.cfm/Machine-Vision-Online/Robotic-Vision-Systems-Inc-Says-it-May-Appeal-in-Patent-Infringement-Suit/content_id/1757. Retrieved 14 July 2011.
- ↑ "General Scanning Inc acquires VIEW Engineering Inc". Thomson Financial Mergers & Acquisitions. http://www.alacrastore.com/storecontent/Thomson_M&A/General_Scanning_Inc_acquires_View_Engineering_Inc-549072020. Retrieved 7 July 2011.
- ↑ "GSI Lumonics announces the sale of its Metrology Product Line to QVI". PRNewswire. http://www2.prnewswire.com/cgi-bin/stories.pl?ACCT=104&STORY=/www/story/04-20-2000/0001197109&EDATE=. Retrieved 7 July 2011.
- ↑ "VIEW Micro-Metrology". VIEW Micro-Metrology. http://www.viewmm.com/. Retrieved 7 July 2011.
- ↑ 15.0 15.1 15.2 15.3 15.4 "VIEW Engineering Assignee Patent Directory Page 1". Patentmaps. http://www.patentmaps.com/assignee/View_Engineering_1.html. Retrieved 10 July 2011.
- ↑ "Illumination". VIEW Micro-Metrology. http://www.viewmm.com/illumination.jsp. Retrieved 10 July 2011.
- ↑ 17.0 17.1 17.2 "VIEW Engineering Assignee Patent Directory Page 2". Patentmaps. http://www.patentmaps.com/assignee/View_Engineering_2.html. Retrieved 10 July 2011.
- ↑ 18.0 18.1 18.2 18.3 "VIEW Engineering Assignee Patent Directory Page 3". Patentmaps. http://www.patentmaps.com/assignee/View_Engineering_3.html. Retrieved 10 July 2011.
- ↑ "VIEW Engineering Assignee Patent Directory Page 4". Patentmaps. http://www.patentmaps.com/assignee/View_Engineering_4.html. Retrieved 10 July 2011.
- ↑ "Ronchi Grid". VIEW Micro-Metrology. http://www.viewmm.com/ronchi_grid.jsp. Retrieved 10 July 2011.
External links
 |
 KSF
KSF